Registration Points in Adobe Animate
Submitter: Joel Hofmann
Symbols are a very important tool in Flash animation. They allow animators to produce and manage tweened animations more dynamically while also allowing for high levels of detail, such as the animation I made below.

An often overlooked feature of Flash symbols that is essential to symbols tweening properly is the registration point. If this is not set properly upon the symbol's creation, tweens may become misaligned or broken. This guide will teach you how to ensure your registration points work properly.
Creating a Symbol
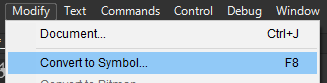
First, select the content that you would like to symbolize, and convert it to a symbol with Modify > Convert to Symbol.
Setting the Registration Point
This will open up a window. In it, you will see a grid of 3x3 white points labelled "Registration". This allows you to set the registration point to a part of the symbol.
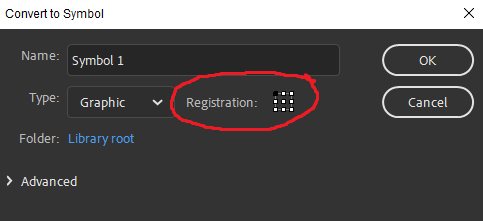
You will probably want to set the registration point to the center. To do this, click the white dot in the center of the grid, turning it black. Then hit OK to create your symbol.
Viewing the Registration Point
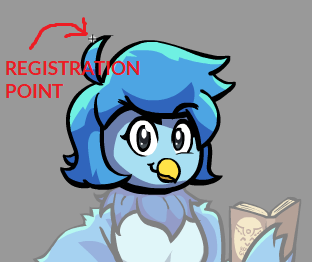
When viewing your symbol, you will see a black crosshair somewhere on the canvas. This marks the registration point. When the symbol is rotated or squashed with a tween, it will deform around this point.
Keep in mind that the registration point cannot be changed. You will need to move your content around the registration point in order to effectively change it, which can mess things up in your animation, so be sure to set it correctly initially.
Be sure to keep this practice in mind when creating symbols, and you can help keep your animations organized and clean, saving time with dynamic editing.